Friday, April 18, 2014

Duck! Rabbit!

We read the book Duck! Rabbit! by Amy Krouse Rosenthal and Tom Lichtenheld.   It's about two people who look at the same thing and see two different things - one sees a duck, one sees a rabbit.  They argue and show their perspective throughout the book.  "Two unseen characters debate the identity of the creature at the center of this clever book - is it a duck or a rabbit?  Readers will join in the discussion, because the creature could, in fact, be either.  Just as each of the debaters begins to see the other's perspective, the duck/rabbit runs away and they see an anteater.  Or is it a brachiosaurus?"  

After reading the book and talking about our perspectives, we made a duck/rabbit (or "drabbit" as one student liked to call it!)  


Coloring the duck
The duck!


But if I turn it around...
See my duck?

It will be this bunny!


Tuesday, January 21, 2014

Coloring with Paper

For the past two weeks, the kindergartners have been coloring...without crayons!  They have worked on ripping paper (using "alligator fingers") into small pieces and then gluing them onto a picture.  The goal is to have the picture colored without using any crayons or markers.

Tuesday, January 7, 2014

Melted Snowmen

In Kindergarten, we made "melted snowmen"!  First, the students worked on cutting out the "snow pile"...


Then they cut out pieces for their snowmen, without drawing the pictures first.  NO PENCILS ALLOWED!


This was a challenge, as many had never cut out a circle without a guide before.  We talked about rotating the paper while closing the scissors.  A new skill for every student!

Tuesday, December 3, 2013

Puzzles!

Looking for pieces
In Kindergarten, we worked on some paper puzzles.  Each child found pieces numbered 1-4 and then worked to put them together.  After they discovered all the pieces and organized them on paper, the students then glued them on the blue construction paper.  We talked about putting glue on the back of the white paper (not on the blue paper), so that we use just the right amount.
Making sure to get glue
 in all of the corners!
There was a lot of gluing to be done!


Time to color and decorate!


Then the children were allowed to decorate their gingerbread men.  Some used "rainbow frosting", some colored them brown...one even made his black - or "burnt"!

Friday, November 22, 2013

Relaxation Bottles

I've had requests for more information on the relaxation bottles the preschoolers made earlier this year, so I will do my best to explain how they were made.


Here is where I got most of my information.  There was some trial and error involved to find the best combination and ratio, but this site helped a lot.

First, I took some glitter glue that I bought in the scrapbooking section at Wal-Mart.  I squeezed about half of the bottle of glue into a bowl with hot water.  I used a whisk to break down the glue until it looked like sparkly water.  I did get some foam, but just used a spoon to get rid of it.  I didn't put a lot of hot water in, since I only used a 10 oz. bottle for the preschoolers.  At this point, I also found it easiest to add in some clear gel glue (either tacky glue or Elmer's clear glue works).  Since the water was still hot, I whisked the water to melt the glue. 

After it cooled slightly, I poured this combination into the water bottle.  Make sure the water isn't too hot or it will warp the bottle!  I poured some ultrafine glitter (also found in the scrapbooking section at Wal-Mart - make sure it's ultrafine or the glitter will just sink) into the bottle and shook.  Again, you will get foam!  Just pour it off the top and add more water if needed.

After you have the color combination you want, you need to make a decision.  Do you want this bottle to be a "timer" with a specific set time or are you happy with the way it looks and falls?  ***As the water cools, it will fall more slowly***

If you are satisfied with the way it looks, add enough water to fill the bottle and allow it to cool. When cool, give it a test shake.  If it still passes the test, then super glue the lid closed and you're finished!

If you want this to be a timer:  adding more clear glue will increase the time it takes to settle.  You can melt additional clear glue in hot water and add slowly to the bottle to make a timer.  Wait until the bottle is cool to check the time.  When satisfied and the water is cool, make sure the bottle is full, super glue the lid closed ,and you're finished!


If you're having any trouble, please leave a comment and I'll do my best to help you figure it out or add some pictures to the mini-tutorial :)  The kids love them and I'm so happy that people are using them!

Thursday, November 7, 2013

The Big Green Monster Visits Preschool

The Big Green Monster strikes again!  This time, he visited preschool.  We listened to the story and created our own Big Green Monsters as the pieces were discussed.

We started by coloring the center of the small paper plate green

Then adding two yellow eyes, a bluish-greenish nose, and a scary red mouth with sharp white teeth!

Go Away Big Green Monster!


Tuesday, November 5, 2013

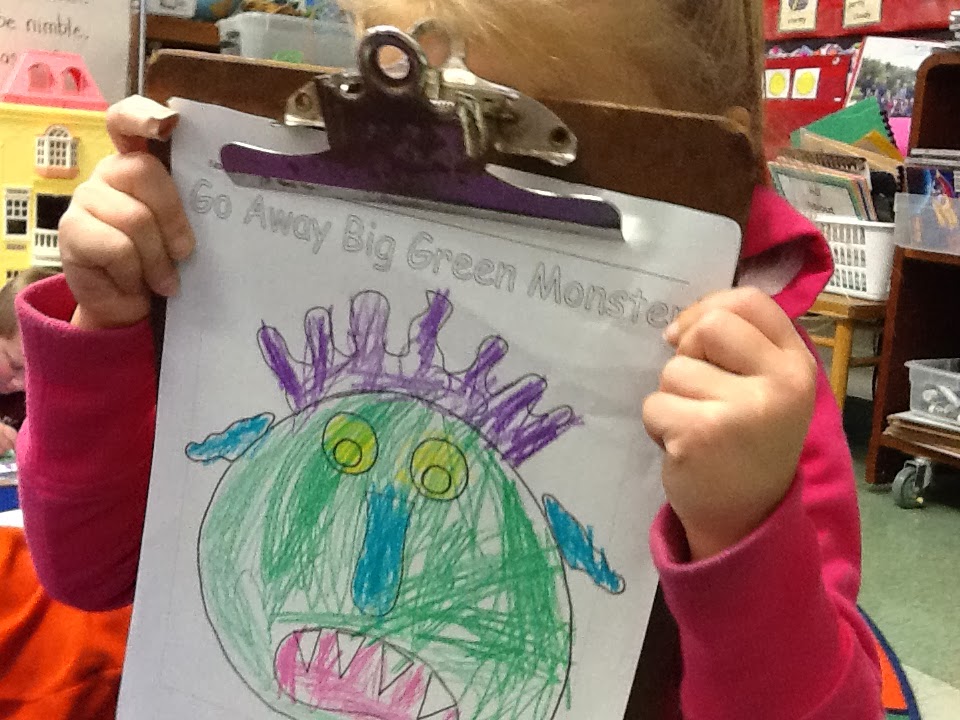
Go Away Big Green Monster!

We read Ed Emberly's Go Away Big Green Monster! using the iPad app.


As each page came up, the children saw another piece of the monster's face.  They colored their page to match the monster.


The students loved seeing the animations in the app.  After the activity was done, we listened to the song available within the app and watched the illustrations come to life!

Sorry for the blurry pictures - these kids are always in motion!


Go Away Big Green Monster!